One of my favorite ways to get my kids involved in the kitchen is juicing! They love seeing the colorful results of feeding our favorite produce into the juicer. Below are all of our favorite homemade juices: my go-to green juice and the pink drinks my daughters created and now ask for all the time! Gather all of the fresh produce in your kitchen and let's get juicing!

My three kids are very much into homemade juice these days and I am all about it. Juicing is a fun and delicious way to get a quick nutrient boost...it's like a liquid vitamin! They love to pick their favorite fruit and vegetable combinations to go into these homemade juices. They tend to choose all fruit, but I can usually convince them to sneak a veggie or two in! Today I'm featuring everyone's favorites: my go-to green juice and the girls' two favorite pink drink juicing recipes.
In general, I'm more of a smoothie person but there are some vegetables that are just not ideal for smoothies (like celery or cucumber). Every now and then I love to add fresh homemade juices to my diet. As part as a balanced diet they are a wonderful way to increase your nutrient intake efficiently in an enjoyable way. My kids get so excited when they hear the juicer going! They love pushing produce through and watching the vibrant, colorful juice come out. This has been a really fun way to introduce fruits and veggies that they normally might have been more hesitant to try!
Reasons to Juice
- Juicing doesn't activate your digestive system since it removes the fiber from the fruit and vegetables used. I get tons of dietary fiber, so I don't worry about removing it every now and then from the juice. Juicing is a quick and easy way to get tons of the nutritional benefits from a variety of fruits and veggies without having to eat a giant bowl of kale, carrot, beets, parsley, ginger, celery, cucumber, etc. It is also great for kids who might not be getting enough fruits and vegetables into their diet otherwise. Whole produce is best (so you get the benefits of dietary fiber and teach kids to enjoy fruits and vegetables in their whole state) but juicing gets them used to the different tastes and it's an easy way to get a snack packed with nutrition. Plus, I love that there are no additives or preservatives...and no added sugar!
- Fresh, homemade juices are absolutely delicious and so refreshing. It is incredibly hydrating and when served chilled with the right combination of produce and a touch of natural sweetness it tastes like a fun treat. I typically add an apple to whatever I'm juicing to naturally sweeten it. Other sweet juicy fruits that are nice to add are pineapple, watermelon, and pear.
- When I have produce that is close to going to bad, slightly over ripe, or otherwise not ideal for eating whole, I love to juice them! I usually throw in leftover parsley (stems and all!), carrots, celery, beets, apples, lemons, limes, pears, greens, or whatever produce I have on hand. Don't use spoiled produce for fresh juicing, but if you have produce that's slightly soft or extras of something, juicing is perfect for eliminating food waste.
Juicing Tips
- Save veggie scraps in your fridge or freezer like the celery leaves, cucumber ends, kale stems and parsley stems. They are perfect for juicing!
- Use the low setting on your juicer for items without a peel, large seeds and/or core. The low setting is great for cucumbers, Use the high setting for items that have a peel (like lemons) or large seeds/core (like apple).
- If juicing an item with a pit (like a peach or mango) - remove the pit first.
- All fruit needs to fit into the juicer chute. You may need to cut some large apples in quarters instead of halves.
- There is no need to peel the fruit. You can even juice watermelon rind! But, it can affect the flavor and texture of the final result (usually it makes it thicker and slightly bitter). You may find you like certain juices with the rind/peel and some without.
- When juicing herbs, ginger root and/or turmeric root, sandwich the herbs or root between two sections of apple for best results.
- If juicing tiny or messy items put them in the chute with the tamper inserted before turning your machine on.
- Add ice to the pitcher of your juicer for the best results/flavor. I love my juice very well chilled. I dislike juice at room temperature. During the colder months I sip my ice cold juice alongside a cup of steamy hot tea so I don't get too cold.
- I personally do not like the "froth" or "foam" and usually leave that behind in the pitcher (the pitcher catches it automatically as you pour it into your glass).
- Rinse all the parts of your blender right away. It is SO much easier to clean it this way versus letting the pulp cake on and having to scrub later. If you do forget you can soak the parts in your sink or even throw in your dishwasher. My typical cleanup routine is give everything a quick rinse with just water and then toss in the dishwasher. I have owned the same juicer for over ten years and never once had an issue with it. And I always run the parts through the dishwasher.


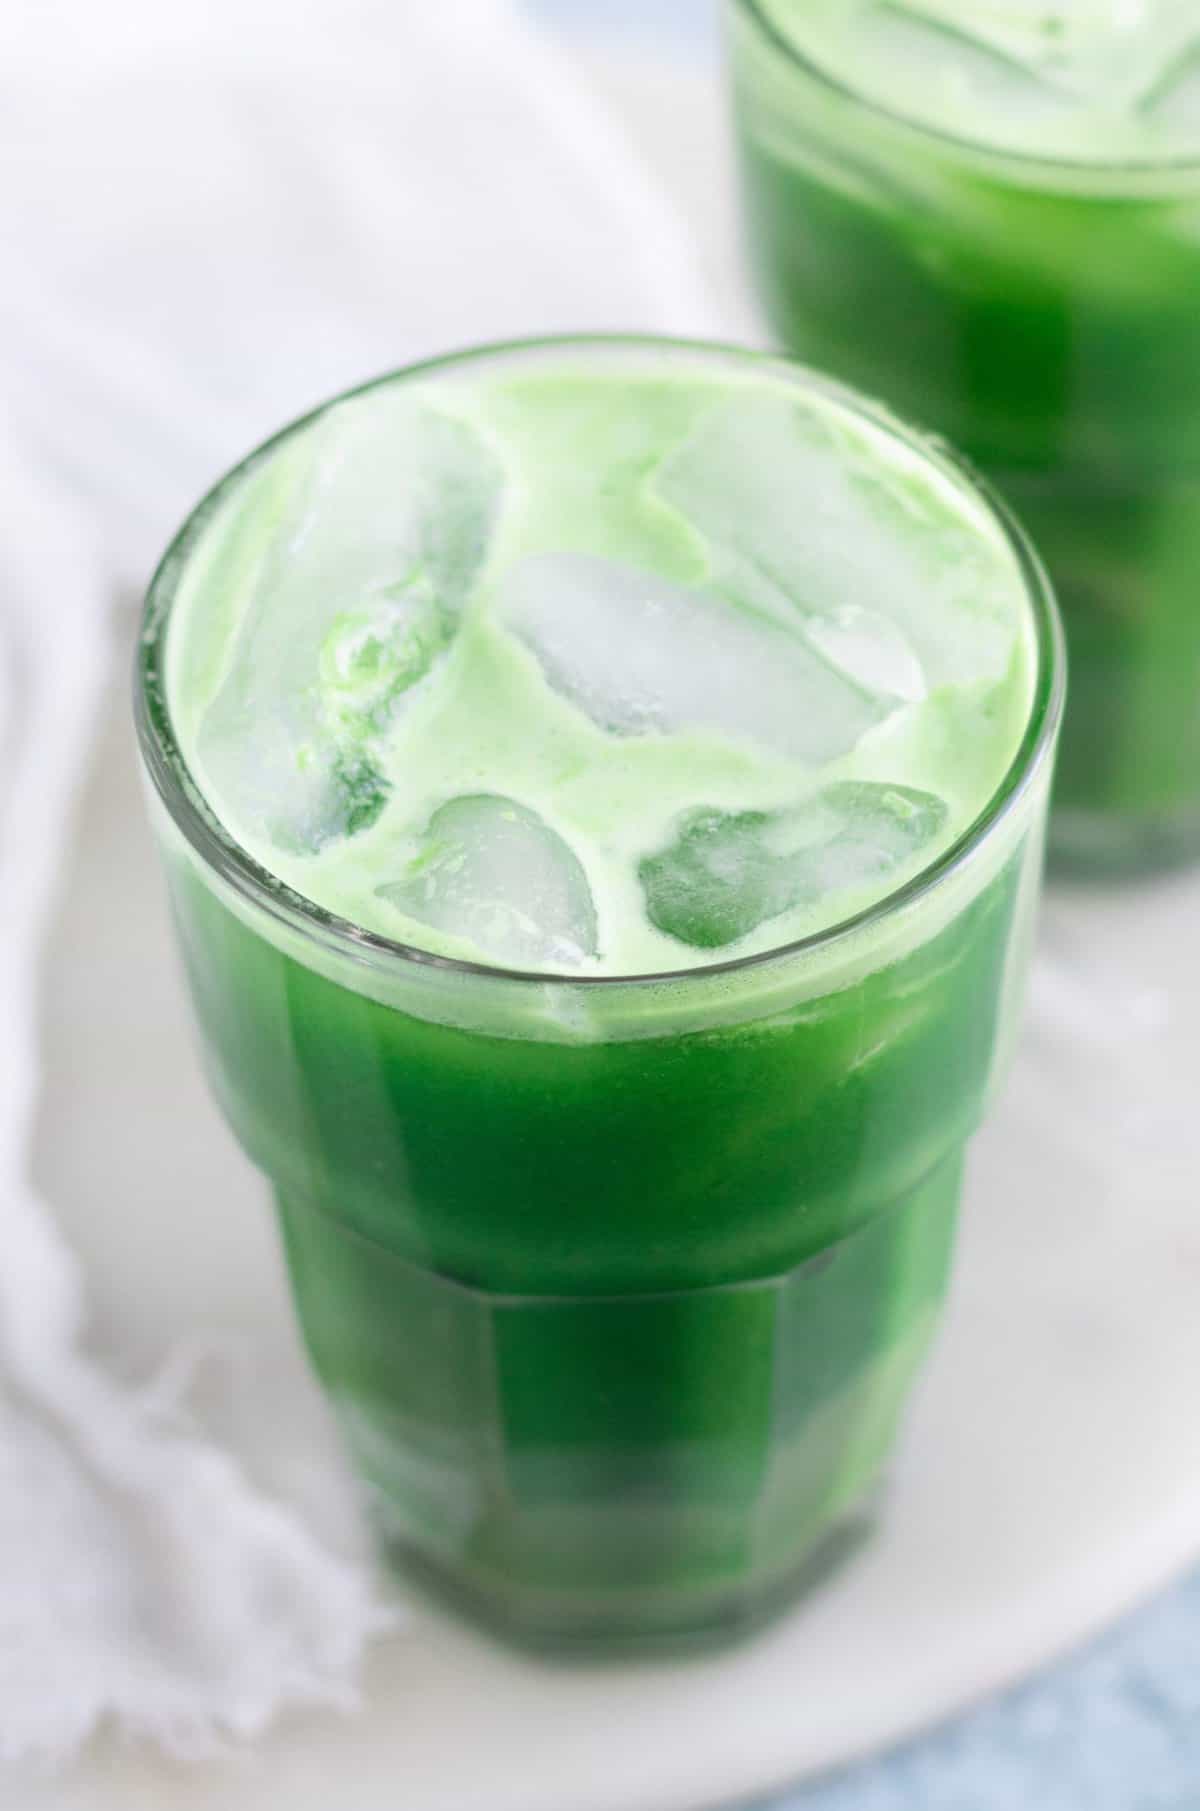
The Best Green Juice
This is my very favorite green juice! One of my favorite things about juicing is that you can adjust everything according to your preference. I love including the apple and lemon for a bright and sweet flavor that balances well with the more earthy flavors, like the kale and parsley. A green juice like this is such a good way to get loads of vitamins and a variety of produce in one gulp! Yum!
Print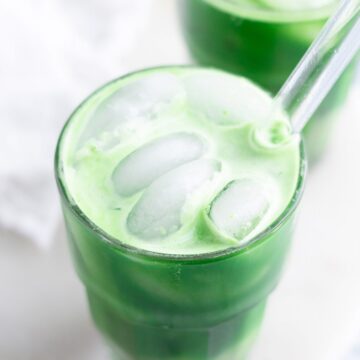
Elaine's Favorite Green Juice
- Total Time: 5 minutes
- Yield: 30 ounces 1x
- Diet: Vegan
Description
This refreshing green juice is loaded with nutrients and tastes incredible - so much better than any bottled juice I've ever had! And way less expensive too. The slightly sweet and tart green apple offsets the vegetables. The lemon brightens everything and the ginger helps to mask the bitter flavor of the greens.
Ingredients
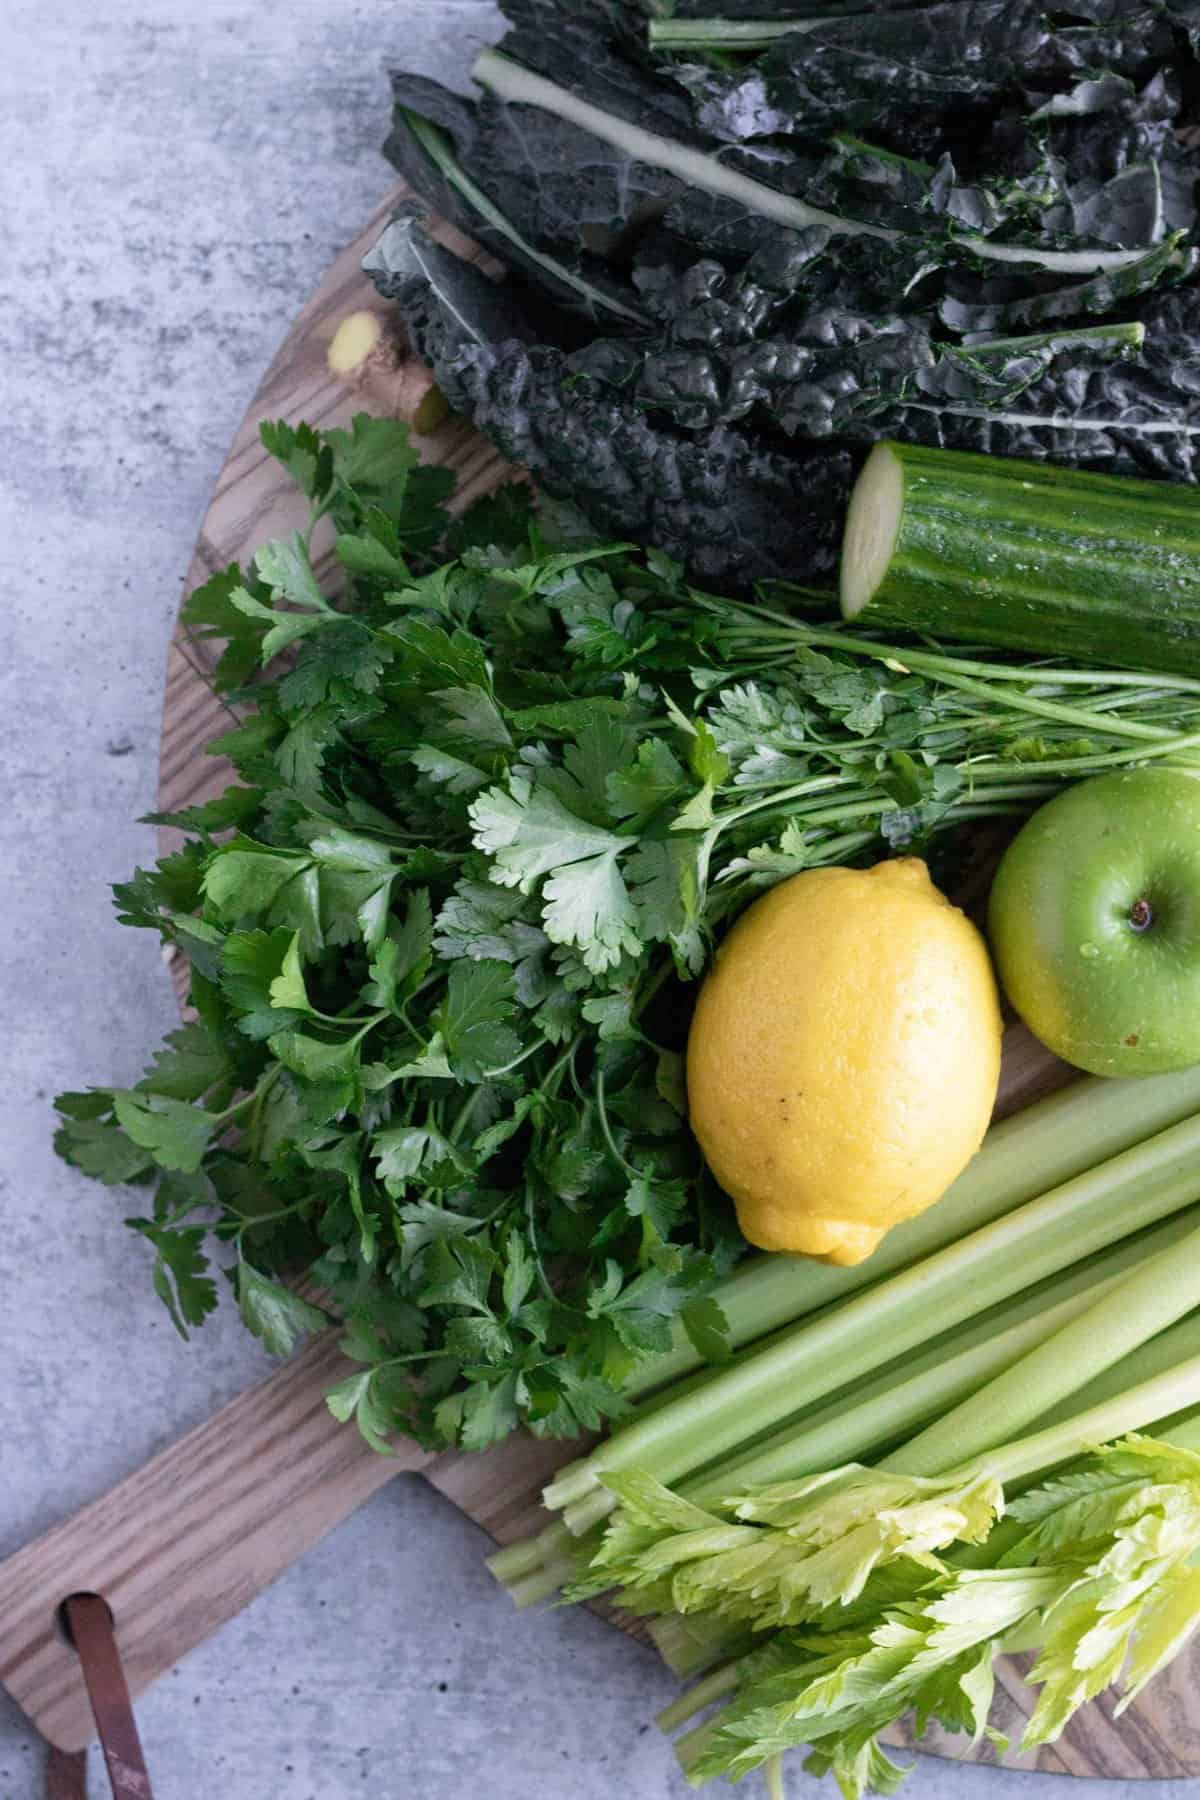
- 1 head of celery (leaves are okay here too) [one head typically yields 12 celery stalks]
- ½ English cucumber, skin on
- 1 large green apple, quartered (stem and core left intact)
- 1 bunch of fresh Italian flat-leaf parsley, leaves AND stems included
- 8 large Lacinato kale leaves (any variety of kale works or any leafy green such as 5 ounces of baby spinach)
- 1-inch fresh ginger (not need to peel)*
- 1 lemon (no need to peel)**
Instructions
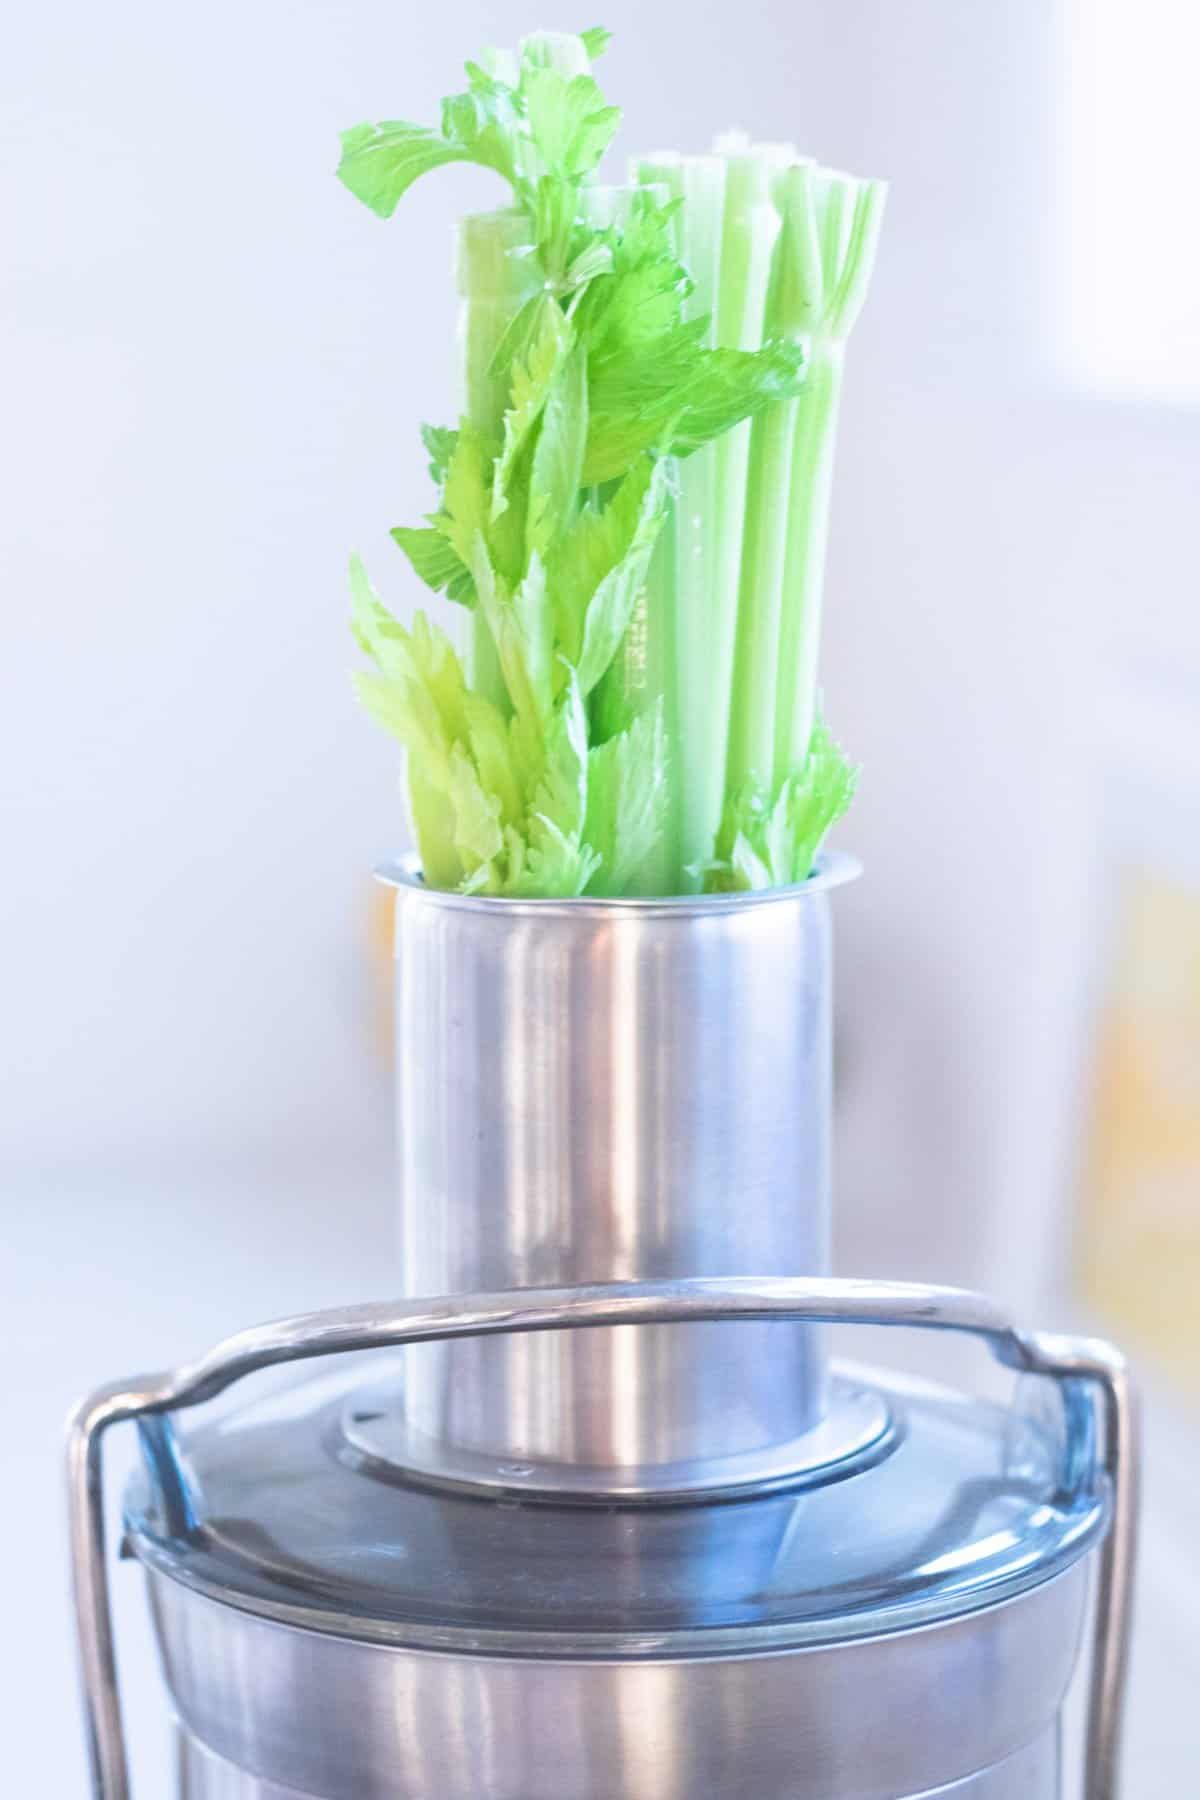
- Wash all your produce well. Prep your produce according to the ingredient list details above.
- Fill your juicers pitcher halfway with ice cubes.
- Place celery in the chute and juice on the low speed.
- Place 2 of the apple wedges in the chute followed by the parsley, kale and ginger. Then place more apple on top of that so the parsley and ginger are sandwiched between the apple. This will help them juice more easily and efficiently. Juice on the high speed. If your juicer's chute cannot fit all this at once divide into two batches - just be sure to place the parsley, kale and ginger between two apple slices.
- Juice the lemon on low speed if peeled and high speed if not peeled.
- The juice will now be in the chute and chilling over the ice cubes. Give the juice a good stir with a spoon while in the pitcher. With the pitcher's lid on (to catch the frothy part) pour the fresh juice into two large glasses filled with ice cubes. Enjoy immediately.

Notes
* I typically use 2 inches of ginger but I know most people don't like it too spicy. I suggest starting with 1 inch from a knob of ginger and you can always add more the next time as you get used to it. I love the taste (and health benefits) of ginger but I know not everyone does. You can also just leave it out if desired. When I make this for my kids I leave it out.
If you prefer it sweeter, add a sweet red apple, juiced on high speed. You can leave the skin and core intact. I typically cut into four wedges so it can fit in my chute.
Homemade juice is best enjoyed immediately but you can store in an airtight container (to the very top ideally) in your refrigerator for up to 24 hours. If you do, be sure to shake well before enjoying.
- Prep Time: 5
- Category: Beverage
- Method: Juicer
Best Homemade Juices for Kids
My daughters are currently 5 and 7 and they love creating juices! They thought of these juices on their own, then photographed and edited them as well. They're so excited to share them here on the blog and I am one proud mom! I hope this inspires you to try juicing with your kids. It's such a fun way to encourage them to explore new fruits and vegetables. Even my littlest, David, enjoys getting involved in the kitchen when the juicer is going! David's favorite combination these days is 3 pears, 1 red apple and 1 pomegranate (pictured below).

And my husband, Bobby, loves straight up orange juice. Classic and beyond delicious! We like to peel the oranges if we have time for the sweetest taste. It is SO fresh and once you try it, it is difficult to go back to store-bought orange juice. I usually like to add lemon and ginger in my orange juice. Just a touch!
Now, time for Jade's favorite juice...

Homemade Cranberry Apple Juice
Jade's favorite juice is a little bit tart from the cranberries, but mostly sweet! She keeps it simple with a sweet red apple and a huge handful of rinsed cranberries. Between you and me I think the most exciting part to her is the vibrant pink color, but of course it tastes delicious too! I love that this recipe uses any leftover cranberries from holiday cooking, and the apple adds the perfect amount of sweetness to balance everything out.
Print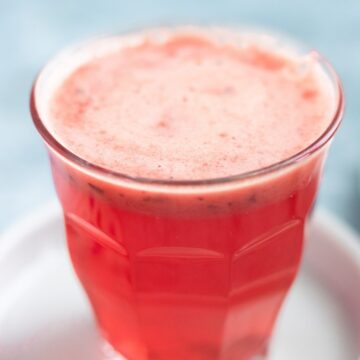
Jade's Favorite: Cranberry Apple Juice (Jade calls it: "Pinky Pink")
- Total Time: 3 minutes
- Yield: 2 cups 1x
- Diet: Vegan
Description
Tart but mostly sweet. Very refreshing and totally delicious!
Ingredients
- 1 large sweet red apple, quartered (leave core and stem)
- 12 ounces raw cranberries, rinsed
Instructions
- Fill your juicer's pitcher halfway with ice cubes and fit the pitcher to the juicer to catch the juice.
- Place cranberries in your juicer's "chute" then place apple overtop. Turn on your juicer and use the plunger to press the fruit into the blades. It is helpful to add the cranberries underneath the apple so they don't bounce out of the chute. The apples help weigh them down and help them along through the juicer as well for more efficient juicing.
- When all fruit is juiced remove the pitcher from the machine and stir well with a spoon. Place the lid and pour into glasses filled with ice cubes. Serve well chilled and enjoy immediately.
- Prep Time: 3
- Category: Beverage
- Method: Juicer

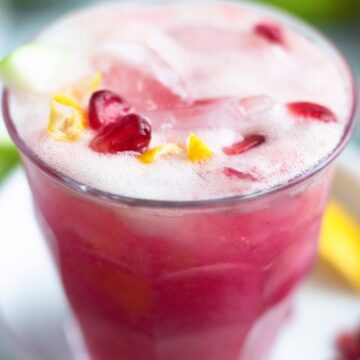
Pomegranate Pear Juice
Riley's favorite homemade juice is pink (just like her sister's apple cranberry juice recipe!) but with a few more fruits added in. She loves to juice an apple, a pear, a half a pomegranate, and half of a lemon to create this sweet drink. She gets SO excited when the pomegranate goes through the juicer and turns the whole thing pink! This is her "pink drink" and on days when I struggle to get fresh foods onto the kid's plates, I know I can always get her to drink a big glass of this juice.

Riley's Favorite: Pomegranate Pear Juice (aka Pink Drink)
- Total Time: 3
- Yield: 2 1x
- Diet: Vegan
Description
Sweet, Tart, Refreshing, and Delicious
Ingredients
- 1 large green apple, quartered (leave core and stem)
- 1 large pear, cut to fit in your juicer (leave stem and seeds)
- half a large lemon, skin on
- half of a whole pomegranate, skin on
Instructions
- Fill the juicer jar with ice.
- Get your juicer and gather ingredients.
- Put your ingredients in the chute with the tamper inserted before turning on the machine to prevent splattering. Once inserted, then turn your juicer on high speed and juice. Repeat with all ingredients, turning the motor of the juicer off between items.
- ENLOY(with ice).
- Prep Time: 3
- Category: Drink
- Method: Juicer
More Fresh Drinks
If you are craving more nutritious beverages check out some of our favorites below (all vegan, gluten-free and refined sugar-free):
ABC Juice (Apples, Beets and Carrots)
Green Juice in a Blender (no juicer needed!)
Watermelon Mint Lime Agua Fresca
Sparkling Cranberry Pomegranate Mocktail
Strawberry Mint Lime Spritzer Mocktails
Tropical Green Protein Smoothie
Leave a Reply