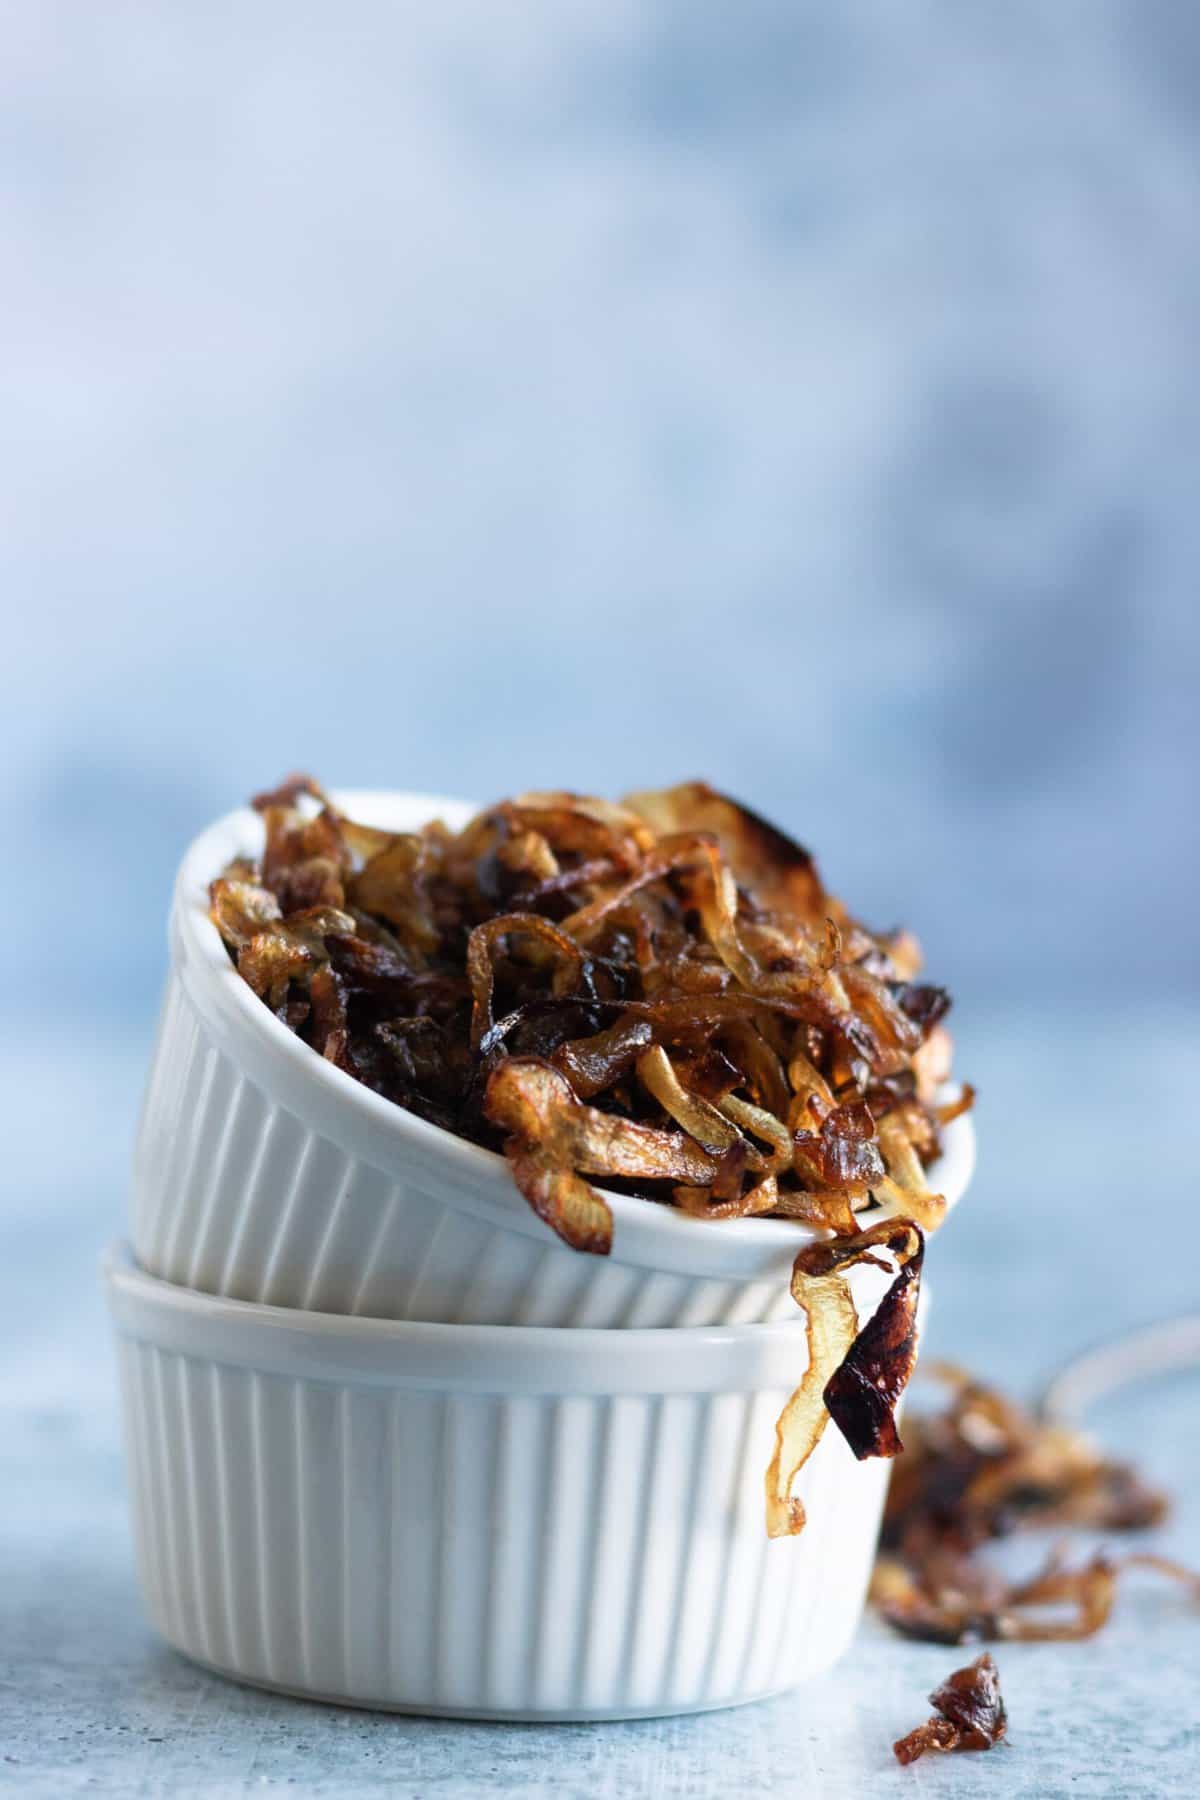
Learn this easy foolproof method for caramelizing onions! All you need is olive oil, salt and some time on the stovetop. The natural sugars release during the cooking process, resulting in crispy golden brown onions bursting with sweet flavor. Add them to soups, salads, bowls, burgers, pizzas... the possibilities are endless!

Be prepared to make a lot because these caramelized onions will be gone quick. I actually 4x the recipe when I make this 5-ingredient mujadara!
It's pretty remarkable in terms of the effect that slow cooking has on onions. It basically creates the exact opposite of the veggie in every single way. Sharp and pungent yellow onions transform into sweet and savory deliciousness that even kids will gobble up in seconds.
I use these caramelized onions on... pretty much everything! The caramelization process adds a depth of flavor you can't get from anywhere else and instantly elevates any dish - burgers, pizzas and French onion soup (obviously). However, this must-try plant-based French onion dip is the most requested dish in our household so I always make a big batch to account for that!
The recipe itself is simple, but that doesn't mean quick. Low and slow here is the name of the game - be patient (plan for about an hour on the stovetop) to get perfectly sweet onions every single time!
The key is the controlling the heat level. Start with medium heat and then gradually reduce it down to low. See the full recipe below!

Ingredients
This is a really short pantry ingredient list! We let the flavor of the onions shine, and if that makes you flinch, it's probably because you're thinking of bitter, raw onion. Not on my watch! When you let the onions spend a little time on the stovetop they turn sweet (hence the name caramelized!).

- Yellow onions: I prefer using yellow onions because of their sweetness, but this recipe works for any type of onion. Red onions will give you a beautiful deep purple color!
- Extra virgin olive oil: Some recipes call for butter (or a combination of olive oil and butter), but just a couple tablespoons of olive oil is all you need.
- Sea salt
Picking the Best Onions
When you're shopping for onions, look for ones that have crisp, crunchy skin still intact around the outside. Avoid onions with mushy spots or large dents. It should feel heavy in your hand and pass the smell test. That's right, give your onion a sniff! An onion with a strong, potent odor has probably passed it's prime.
Store onions in a cool, dark place (a pantry is ideal) for up to two weeks.
How to Caramelize Onions
1. Preheat a cast iron skillet on the stovetop on medium heat. I recommend using cast iron because of its ability to retain heat evenly throughout the pan (use a large stainless steel pan instead if you don't have cast iron).
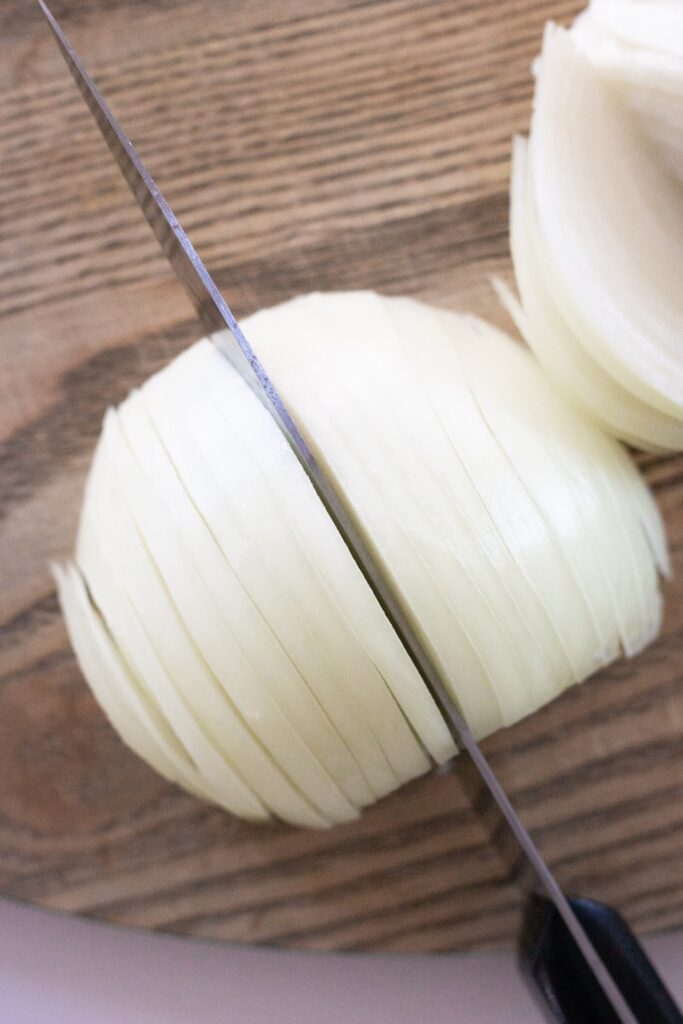
2. Slice the onion(s). While the pan heats up, cut the onion in half through the root end (vertically). Remove the outer layer of skin and trim off both ends of each half of the onion. Cut the onion into ¼-inch slices (with the knife positioned vertically in the same way as when you cut the onion in half). Make sure your slices are all the same size thickness for even cooking.


3. Cook the onions for 5 minutes on medium heat. Once the pan is hot add the onions, oil and salt. Toss well so the onions are evenly coated with the oil and salt. Cook for 5 minutes over medium heat until the onions start to soften and some begin to brown.


4. Reduce to low-to-medium heat and cook for 30 minutes. Continue to toss the onions every couple minutes as they cook. Keep the onions in one even layer throughout the cooking process so all onion slices are making direct contact with the bottom of the pan. They will start to caramelize and turn golden brown. Monitor the onions closely toward the end to prevent burning.
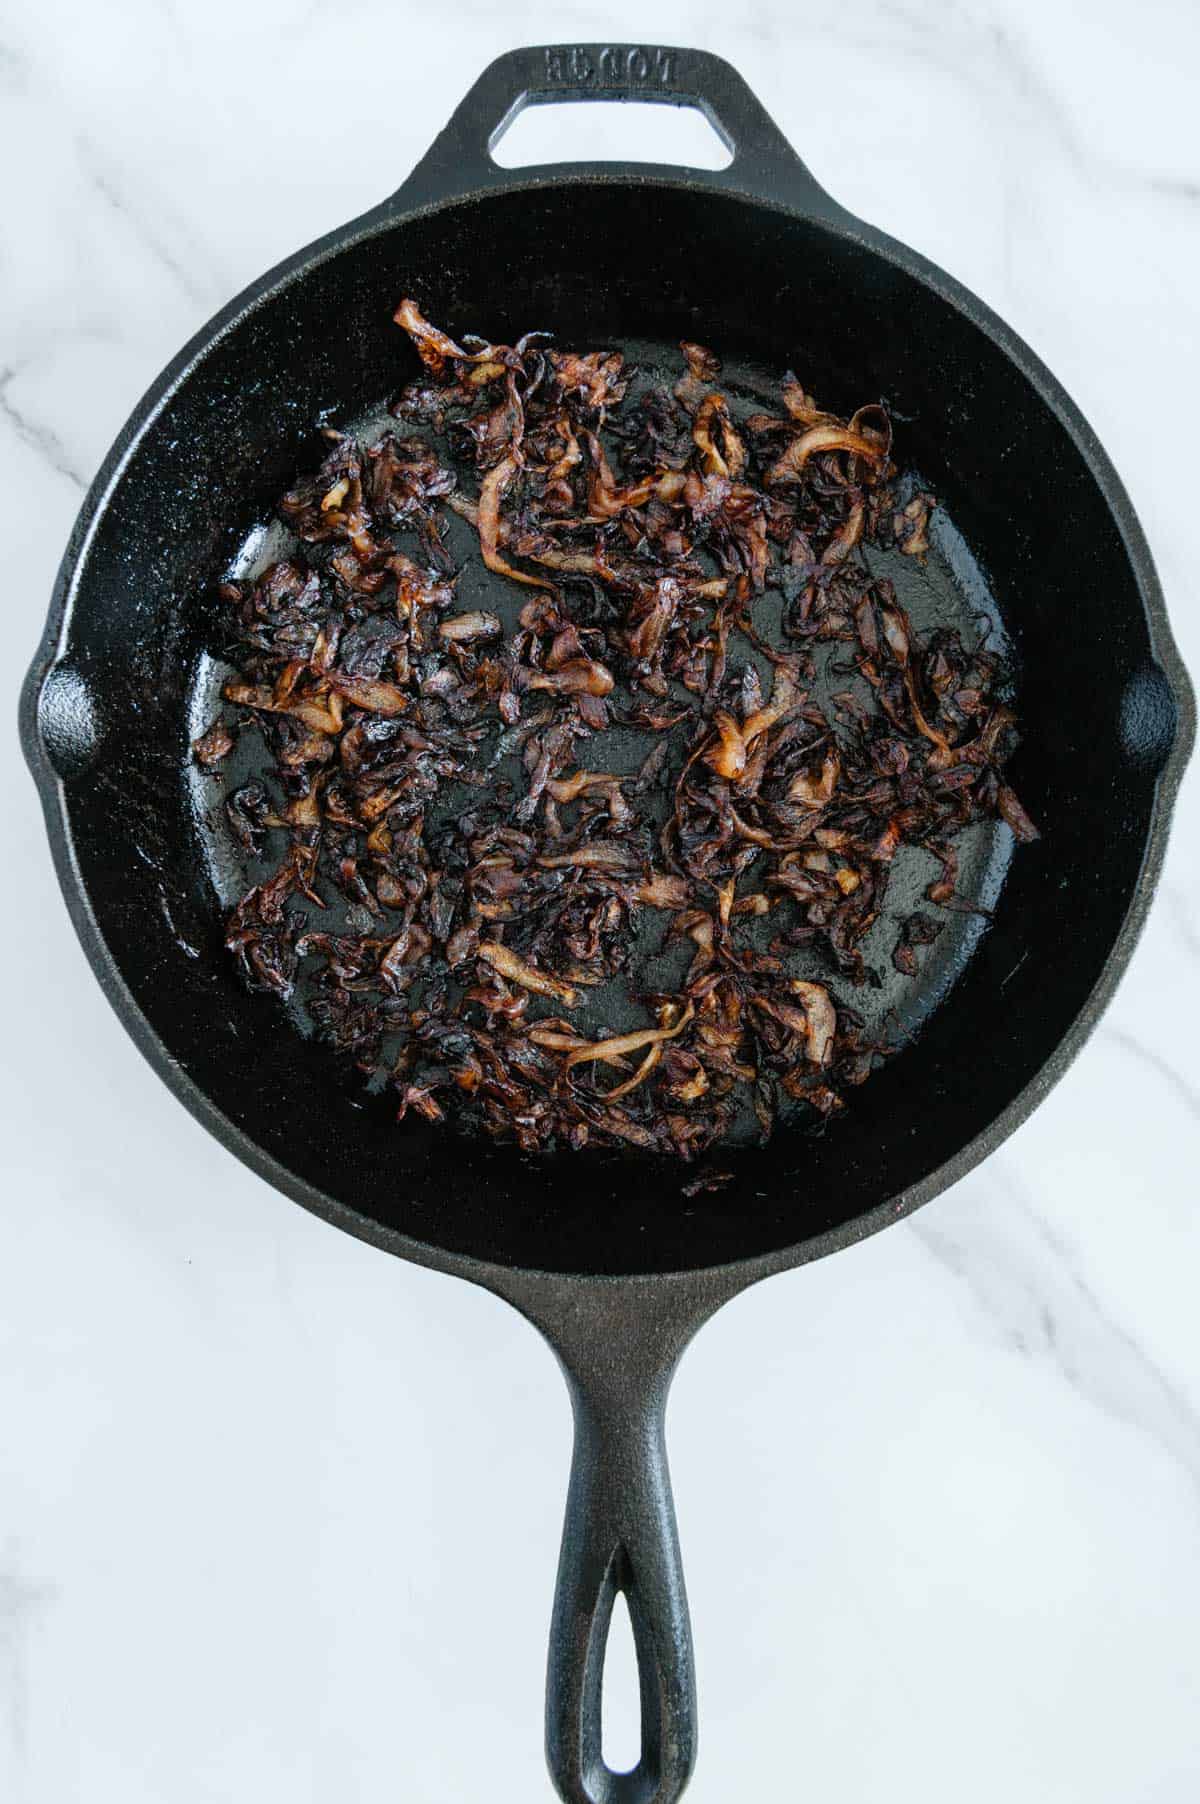
5. Reduce to low heat and cook for 25-30 minutes. Turn the burner as low as it can go and cook until golden brown and crispy. Toss every couple of minutes to brown the onions evenly.

6. Serve immediately (or allow to cool for more crispiness). I like to turn off the burner and allow them to cool to room temperature on the pan before using or storing.

Recipe Tips
Use a good pan. I find I get the best results using a cast iron skillet, which is the best pan for retaining heat. The sliced onions will be spread throughout the pan and we want them all to cook evenly. Some pans don't distribute heat as well, causing one side to be hotter than the other. The exact timing for this recipe may vary depending on the pan you use.
Double or triple the batch! It's no secret that making perfect caramelized onions take a long time given the slow cooking process, so make extra while you're at it! I'll often get two or three pans going at once so I can use them throughout the week.
Storage
Store leftover onions (once fully cooled) in an airtight container in the refrigerator for up to one week.
You can also freeze caramelized onions for future use! Freeze for up to two months. To thaw, either transfer to the refrigerator the night before (allow for about 10 hours) or reheat on the stovetop or microwave.
Serving Suggestions
These sweet caramelized onions will add rich flavor to essentially any of your favorite dishes. I love having extra on hand to quickly enhance a weeknight meal. Some of my favorite pairings are:
- Burgers: Use to top these grillable quinoa black bean veggie burgers!
- Entrées: Add an extra depth of flavor to these cauliflower chickpea shawarma bowls or use as a filling for Mexican night in these vegan taquitos!
- Soups: These lovely brown bits add delicious texture to this vegan pumpkin soup.
- Pastas: Add sweetness and rich brown color to this olive oil and garlic pasta or this caramelized onion apple pasta.
- Pizzas: The most underrated pizza topping! Add these to this vegan white pizza with roasted garlic and basil.
- Mashed potatoes: Trust me, this is the best addition to vegan mashed potatoes!

I hope you love these caramelized onions as much as I do! They are my favorite way to add a burst of flavor to dishes. I can't wait for you to try!
Print
How to Make Caramelized Onions (3 Ingredients)
- Total Time: 65
- Yield: ½ cup
- Diet: Vegan
Description
Learn this easy foolproof method for caramelizing onions! All you need is olive oil, salt and some time on the stovetop. The natural sugars release during the cooking process, resulting in crispy golden brown onions bursting with sweet flavor. Add them to soups, salads, bowls, burgers, pizzas... the possibilities are endless!
Ingredients
- 1 large yellow onion (~ 12 ounces), peeled
- 2 tablespoons extra virgin olive oil
- ¼ teaspoon fine salt
Instructions
- Preheat a cast iron skillet on the stovetop on medium heat. I recommend using cast iron because of its ability to retain heat evenly throughout the pan (use a large stainless steel pan instead if you don't have cast iron).
- Slice the onion(s). While the pan heats up, cut the onion in half through the root end (vertically). Remove the outer layer of skin and trim off both ends of each half of the onion. Cut the onion into ¼-inch slices (with the knife positioned vertically in the same way as when you cut the onion in half). Make sure your slices are all the same size thickness for even cooking.
- Cook the onions for 5 minutes on medium heat. Once the pan is hot add the onions, oil and salt. Toss well so the onions are evenly coated with the oil and salt. Cook for 5 minutes over medium heat until the onions start to soften and some begin to brown.
- Reduce to low-to-medium heat and cook for 30 minutes. Continue to toss the onions every couple minutes as they cook. Keep the onions in one even layer throughout the cooking process so all onion slices are making direct contact with the bottom of the pan. They will start to caramelize and turn golden brown. Monitor the onions closely toward the end to prevent burning.
- Reduce to low heat and cook for 25-30 minutes. Turn the burner as low as it can go and cook until golden brown and crispy. Toss every couple of minutes to brown the onions evenly.
- Serve immediately (or allow to cool for more crispiness). I like to turn off the burner and allow them to cool to room temperature on the pan before using or storing.
Notes
If doubling the recipe you may need to use a larger skillet or you may need to toss more often. It is important that the skillet is not overcrowded or the onions will steam instead of caramelize. I like to make sure that all onions are touching the bottom or side of the cast iron skillet to ensure they cook evenly and at the same speed.
For faster results, dice the onions instead of slicing them. When diced they will take about 25 minutes to caramelize. Just be sure to stir often and keep the heat as low as possible so they don't burn.
I typically do not use water when I caramelize onions. If you keep the burner low enough, use a cast iron skillet and toss every couple minutes you should not need to. A cast iron skillet is really key here.
- Prep Time: 5
- Cook Time: 60
- Category: Condiment
- Method: Stovetop
- Cuisine: Italian, French


Claire says
So delicious and easy!
Elaine Gordon says
Aw thank you so much, Claire! So glad you enjoyed it!
Monica Thomas says
This method was delicious… varying the heat & the cast iron made all the difference. I made them last night and topped my eggs with them this morning. So good!
Elaine Gordon says
Thank you SO much, Monica! They are perfect for a savory breakfast for sure! So glad you loved the tips and the cast iron made a difference for you too. It is amazing how the cooking materials you use can impact the final result so much.
Nicole says
This is an easy recipe but I topped my thanksgiving green bean casserole with these babies last year and it was next level! Will be doing it again this year!
Elaine Gordon says
OMG such a good idea! Might have to copy! Thank you for the five star review!