Description
These vegan and gluten-free sugar cut-out cookies are easy to work with no matter what cookie shape you are using. This simple recipe yields sweet, tender, "buttery" sugar cookies that are perfect for decorating... and can be made in one bowl! Pair them with my vegan vanilla frosting or a refined sugar-free icing option. Happy baking!
Ingredients
Units
Scale
For the cookies
- 1/4 cup coconut oil or vegan butter, softened
- 1/4 cup pure maple syrup
- 1 teaspoon pure vanilla extract
- 1/4 teaspoon almond extract
- 1 1/4 cups super fine blanched almond flour (not almond meal)
- 1/2 cup oat flour (do not use homemade oat flour here)
- 1/4 cup arrowroot powder
- 1/2 teaspoon fine salt
Frosting/Decoration Options
- Vegan Cream Cheese Frosting
- Vegan + Paleo Vanilla Icing
- Vegan Vanilla Frosting
- Easy Vanilla White Sweet Potato Frosting
- natural food dyes can be found here if you want colored frosting
Dye-Free Sprinkles (not all are refined sugar-free, see labels before selecting)
Instructions
- Place the coconut oil or softened vegan butter, maple syrup, vanilla extract and almond extract in a mixing bowl and use a hand mixer to combine on medium low speed until light and fluffy.
- Add the dry ingredients (almond flour, oat flour arrowroot powder and salt) and mix on low speed until combined.
- Divide the dough into two balls and wrap in plastic wrap, then flatten into a disc. Place in the refrigerator to chill for at least one hour or overnight.
- When you are ready to make the cookies, preheat the oven to 325 degrees. Line two half sheet baking sheets with parchment paper.
- Place one disc of dough on a piece of parchment paper. Place another piece of parchment paper overtop the dough.
- Using a rolling pin, roll out the dough until it is 1/2-inch thick. Do not roll too thin or they will not be soft when baked and are difficult to handle when raw.
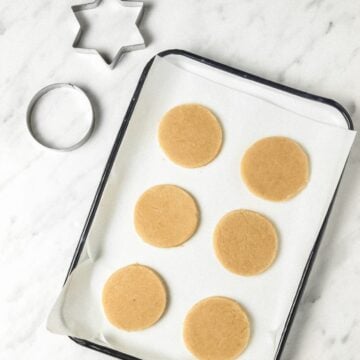
- Cut the dough into desired shapes. Or if you don’t have cookie cutters you can roll into small circles about 2 inches in diameter.
- Bake at 325 degrees for 8 minutes. Be careful not to over-bake smaller shapes or the cookies will be too dry. I like to do 8 minutes for a softer cookie. If you use very large cookie cutters or the dough is thicker than 1/2 inch, the baking time may vary. Check on the cookies toward the end as they can burn easily. You want them to look just slightly golden brown around the edges.
- Remove from oven and allow cookies to rest on the cookie sheet for a few minutes (this allows them to harden a bit before handling them). I sometimes stick the entire cookie sheet in my freezer on a silicone heat pad.
- Carefully move cookies to a cooling rack to cool fully (they will harden once fully cooled).
- Repeat with the other disc of dough.
- Once the cookies are completely cooled, decorate using one of the frosting or icing recipes linked above. Add natural sprinkles if desired before the frosting sets.


- Prep Time: 15 mins
- Cook Time: 10 mins
- Category: Dessert
- Method: Oven Baked